
Restoring a XAMPP Project from BackupNew Page
IfRestoring a projectXAMPP is accidentally deleted, corrupted, moved to another computer, or you need to continue workingProject from aBackup backup,recreates both the website files and databasethe mustMySQL bedatabase. restored.
This tutorial demonstrates how to restore a complete XAMPP projectWork from a backup.
Backup Requirements
Before restoring, you should have:
XAMPP Backups
├── Website Files
│   └── security_dashboard
│
└── Databases
    └── project_db.sql
The project folder contains your website files andof the SQLbackup fileso containsthe youroriginal databaseremains backup.unchanged.
Restore theproject Website Filesfiles
Open
Example:
XAMPPStop BackupsApache └──and WebsiteMySQL Filesbefore └──replacing security_dashboardproject Copy the Files into htdocs
Open:
C:\xampp\htdocs\
Paste thebacked-up project folder into the htdocs.
Example:
C:\xampp\htdocs\security_dashboardfolder Yourthe expected entry page and assets.
Restore the XAMPPdatabase
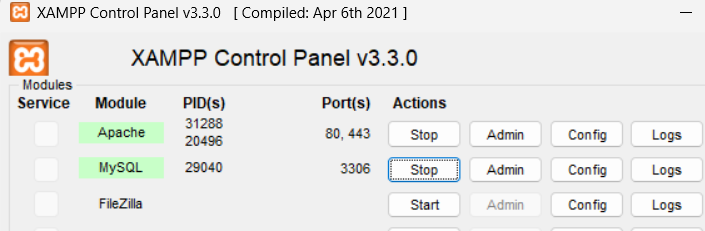
and MySQL.
OpenStart:
Apache
MySQL
Open phpMyAdmin
Open:
You should now see the phpMyAdmin home page.
Click:
Newexpected Createthe a databaseproject, using theutf8mb4.
Example:
project_db
Click:
Create
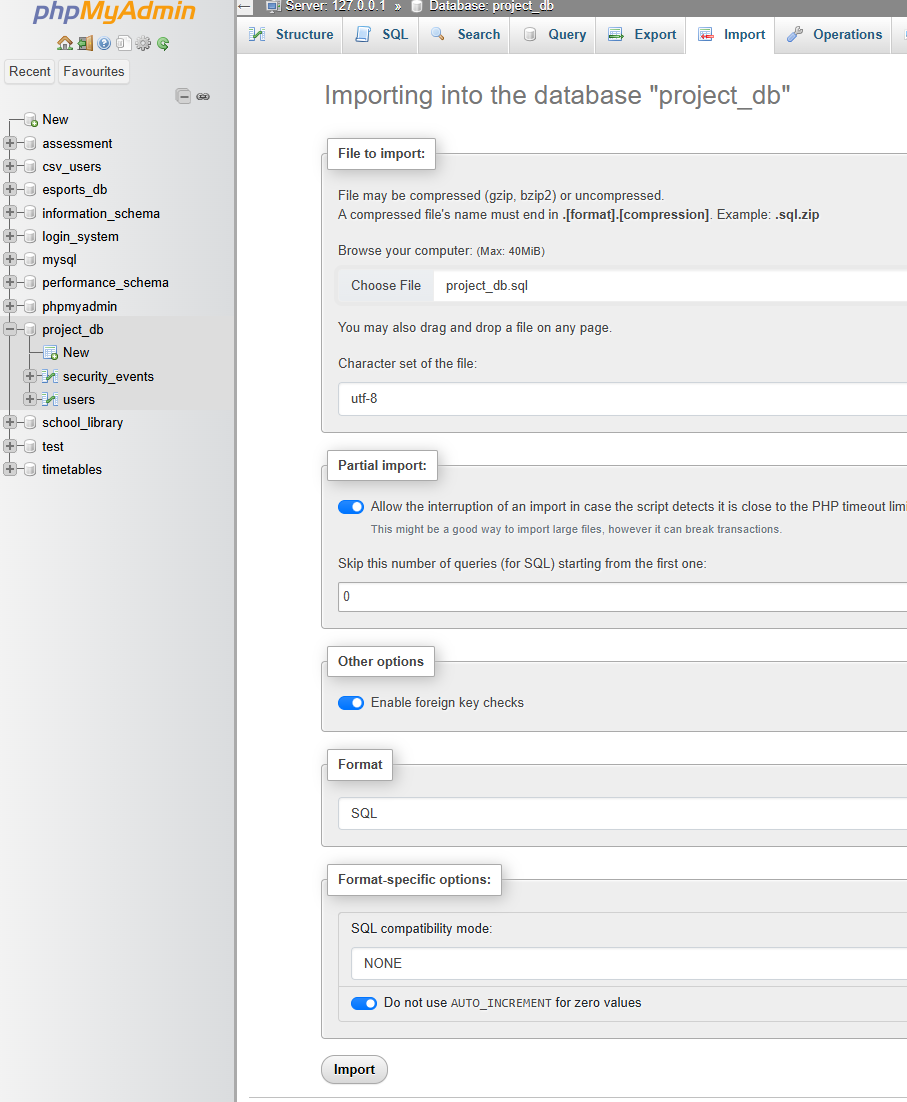
Import the Database Backup
Click:
Import.Choose the backed-up
Import.sqlChoose:
project_db.sqlthe Click:
Import
phpMyAdmin will restore allinspect tables and recordsfictional fromrecords.
If the backupSQL file.export already creates and selects the database, read it before creating another database manually.
Check configuration
Verify the Databaserestoration
SelectTest:
A page loading is not enough; confirm that database changes persist.
Check
htdocs project folder.
SQL import completes without unresolved errors.
PDO connects to the restored database.
You
Example:
project_db
├── users
└── security_events
Click on a tableAuthentication and verifyrole that records are present.
Test the Website
Open your project in a browser.
Example:
http://localhost/security_dashboard/
Check that:
Common Problems
Database Connection Error
Check:
Database name
Username
Password
inside your PHP connection file.
Example:
$conn = new mysqli(
    "localhost",
    "root",
    "",
    "project_db"
);
The database name must match the restored database.
Table Not Found
Example error:
Table 'project_db.users' doesn't exist
Solution:
Page Not Found
Example:
404 Not Found
Solution:
C:\xampp\htdocs\
Restoration Checklist
Website Files
✔ Project folder copied to htdocs
✔ Images restored
✔ CSS restored
✔ JavaScript restored
✔ PHP files restored
Database
✔ Database created
✔ SQL file imported
✔ Tables restored
✔ Records restored
Testing
✔ Website loads
✔ Database connection works
✔ Login system works
✔ Data displays correctly
Complete Restoration Process
Backup Folder
        ↓
Copy Project Files
        ↓
Paste into htdocs
        ↓
Create Database
        ↓
Import SQL File
        ↓
Test Website
You have successfully restored a XAMPP project from a backup.
Next tutorial: Moving a XAMPP Project to Another Computer.