# Displaying JSON Data in a Table
In this tutorial, you will display the device data in an HTML table using JavaScript.
---
## Current Project Structure
Your project should contain:
```text
json-demo
├── index.html
├── script.js
└── smart_security_data.json
```
---
## Create a Table Container
Open:
```text
index.html
```
Update the page so it contains:
```html
JSON Demo
Smart Home Dashboard
```
The table will be generated inside the `output` div.
---
## Create the Table Structure
Open:
```text
script.js
```
Replace the previous code with:
```javascript
fetch("smart_security_data.json")
.then(response => response.json())
.then(data => {
let html = `
Devices
| Device ID |
Device Type |
Room |
`;
data.devices.forEach(device => {
html += `
| ${device.deviceId} |
${device.deviceType} |
${device.room} |
`;
});
html += "
";
document.getElementById("output").innerHTML = html;
});
```
Save the file.
---
## View the Results
Open:
```text
http://localhost/json-demo/
```
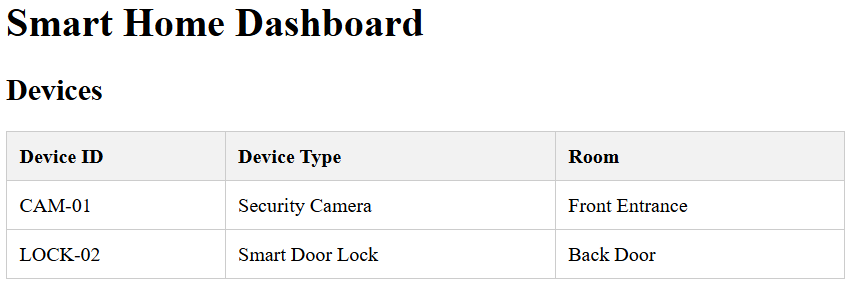
You should see:
| Device ID | Device Type | Room |
| --------- | --------------- | -------------- |
| CAM-01 | Security Camera | Front Entrance |
| LOCK-02 | Smart Door Lock | Back Door |
## Add Basic Styling
The table works, but it looks very plain.
Add the following CSS inside the `` section of `index.html`:
```html
```
Refresh the page.
The table should now be easier to read.
## Display the Home Information Above the Table
Update the start of the HTML string:
```javascript
let html = `
Home ID:
${data.homeId}
Location:
${data.location}
Devices
| Device ID |
Device Type |
Room |
`;
```
The page should now display:
```text
Home ID: GC-HOME-014
Location: Gold Coast
Devices
```
followed by the table.
[](https://mr.napper.au/uploads/images/gallery/2026-06/image-1780916592738.png)
## Complete JavaScript File
```javascript
fetch("smart_security_data.json")
.then(response => response.json())
.then(data => {
let html = `
Home ID:
${data.homeId}
Location:
${data.location}
Devices
| Device ID |
Device Type |
Room |
`;
data.devices.forEach(device => {
html += `
| ${device.deviceId} |
${device.deviceType} |
${device.room} |
`;
});
html += "
";
document.getElementById("output").innerHTML = html;
});
```
You have successfully loaded JSON data and displayed it in an HTML table.